
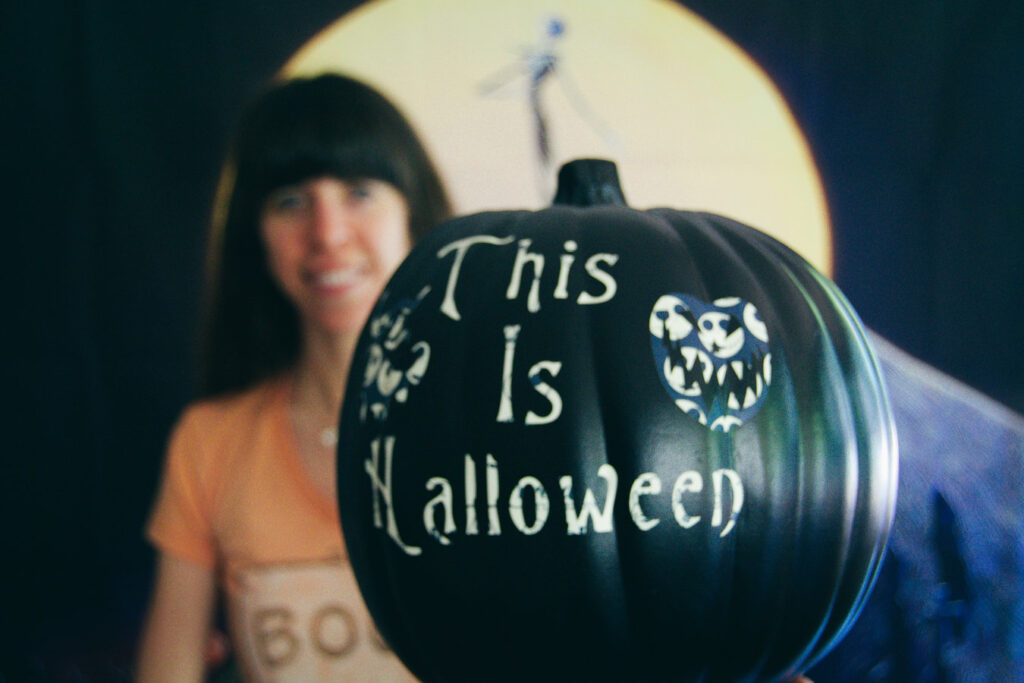
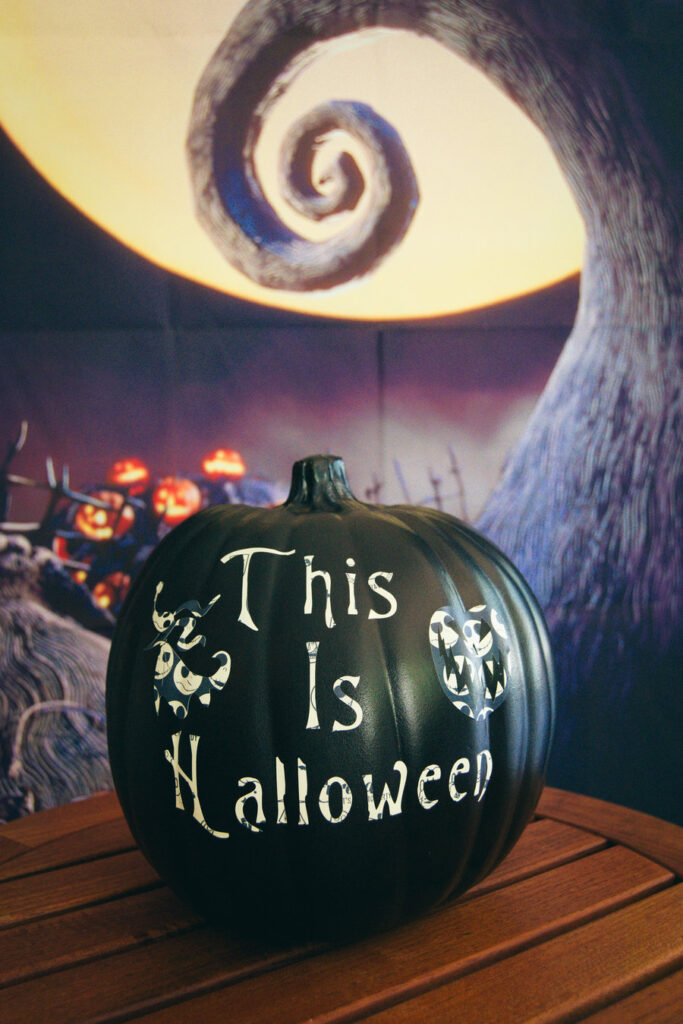
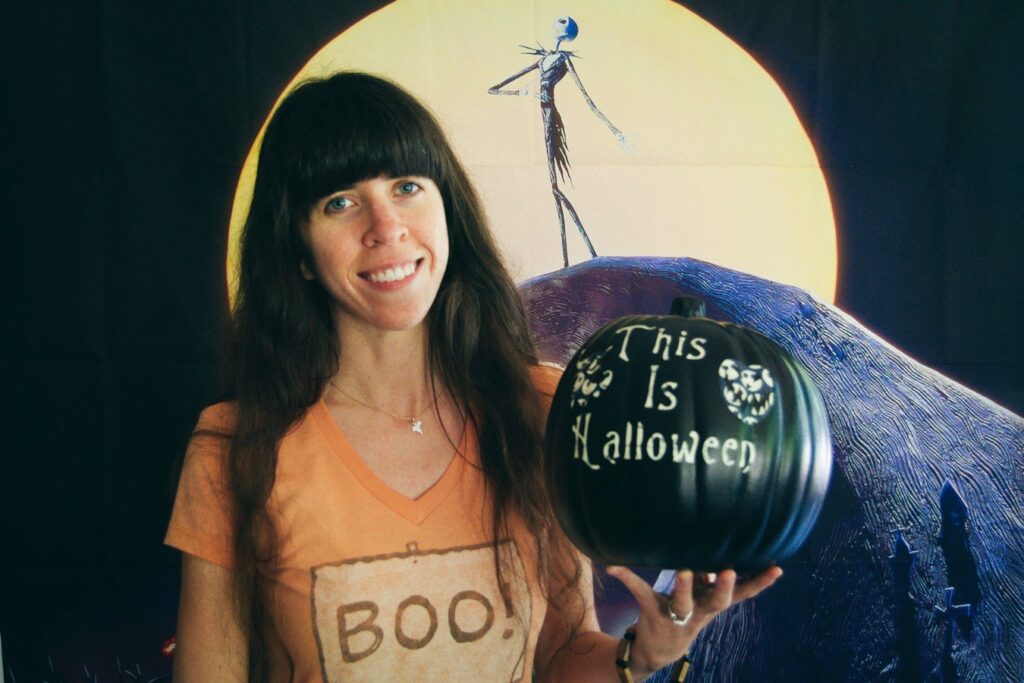
This is Halloween, and that means it is time to have fun decorating and carving pumpkins! I decided to try a new way of decorating pumpkins this year after seeing this on Pinterest. For Blog-O-Ween Day 7, I am going to show you how to make a This Is Halloween pumpkin by using a Cricut machine and adhesive vinyl.
I originally came across this idea from Kayla Makes. She wrote a blog post on how to create your own funky pumpkins with adhesive vinyl. I loved this idea and decided to switch it up a tiny bit.
Before I tell you the materials you need and how to do this project, I want to tell you that I am still very new at using my Cricut machine. I have made a few things over the past few months, however I am still learning myself. If you are experienced with this and crafty I am sure you might find another creative way to do this. If you do not own a Cricut machine, I am sure there are other ways you can create a This Is Halloween pumpkin, whether it is with adhesive vinyl or not!
Materials
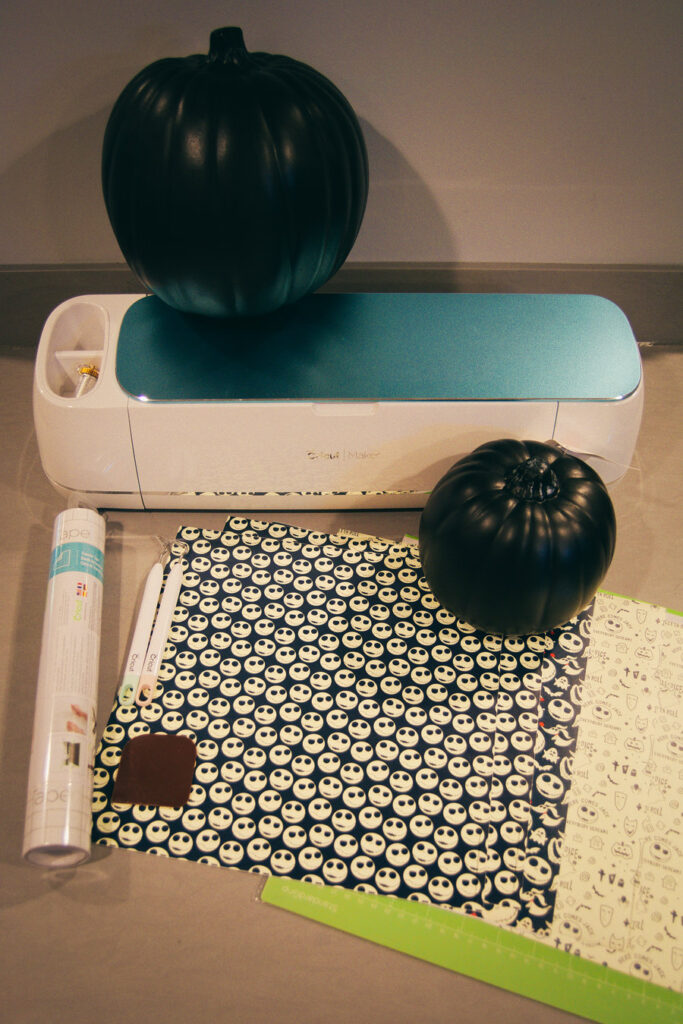
-Cricut machine (I have the Cricut Maker)
-Fake Pumpkins (I decided to use a medium black one but any color and size you want is good. I purchased mine at Michaels)
–Premium Nightmare Before Christmas Vinyl (You can always use a different color or pattern)
-Scrapper
-Computer for Design Space
–Standard Grip Cricut Mat (Green One)
–Nightmare Before Christmas SVG Files (I got mine from Etsy)
Steps
Step One
After gathering all of your materials, you will want to open Design Space on your computer. You can also get your Cricut machine ready to go by turning it on and plugging it into your computer.
I created a new project in Design Space. Next, I used the “Burton’s Nightmare Font” to type “This Is Halloween”. I had already downloaded this font on my computer before. It is not automatically loaded into Design Space. You can find the font for free online and then use it in Design Space.
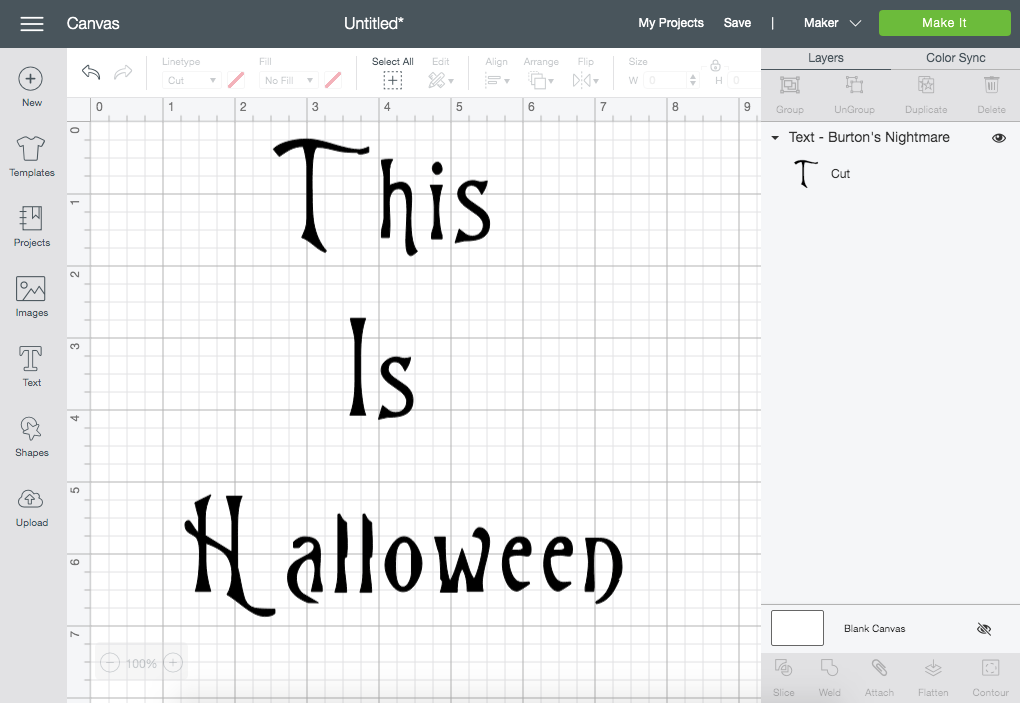
After typing “This Is Halloween” you want to make sure it is a good size to fit your pumpkin. I did a little bit of measuring on my pumpkin just to make sure the font would not be too big or too small.
****I decided to add the jack-o-lantern face and Zero after I already put “This Is Halloween” on my pumpkin. If you want to add other characters you can add them to Design Space now and cut them at the same time. Or you can add them later on different paper like I did. *****
Step Two
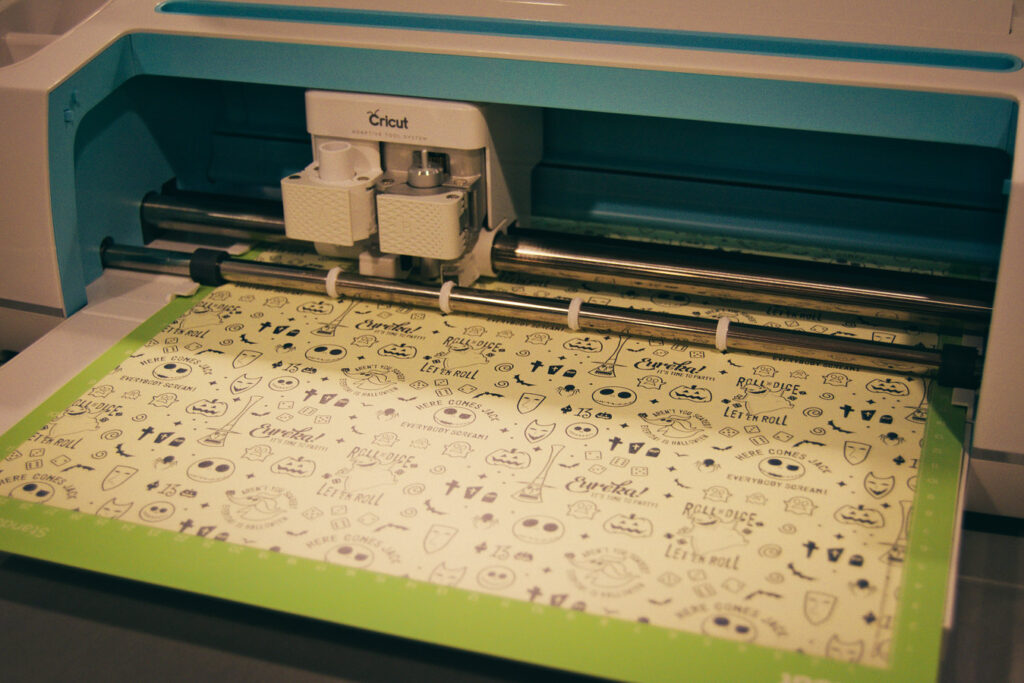
After you have your design in place, it is time to get your adhesive vinyl ready. Put your Nightmare Before Christmas vinyl, design face up, on the standard grip mat. Load your mat into your Cricut Machine. Next, click “Make It” in Design Space.
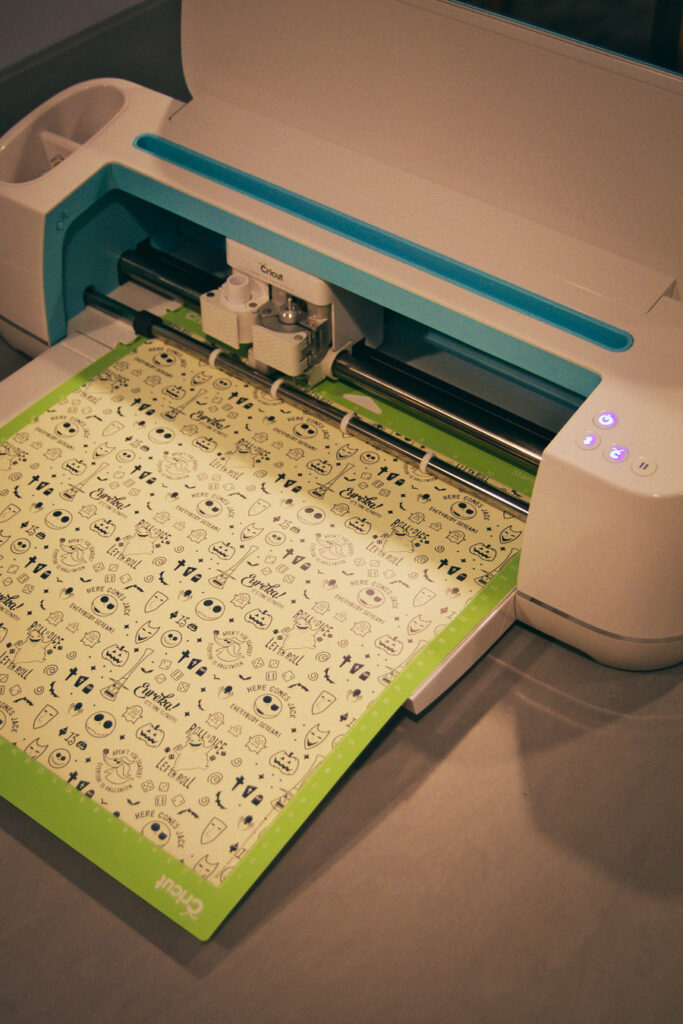
Step Three
Arrange the design in Design Space how you want it to cut on the mat. DO NOT CLICK MIRROR for this project.
Make sure to select the correct vinyl material you are using. Once you have everything set, click the “C” on your Cricut Machine and the cutting will begin.
Step Four
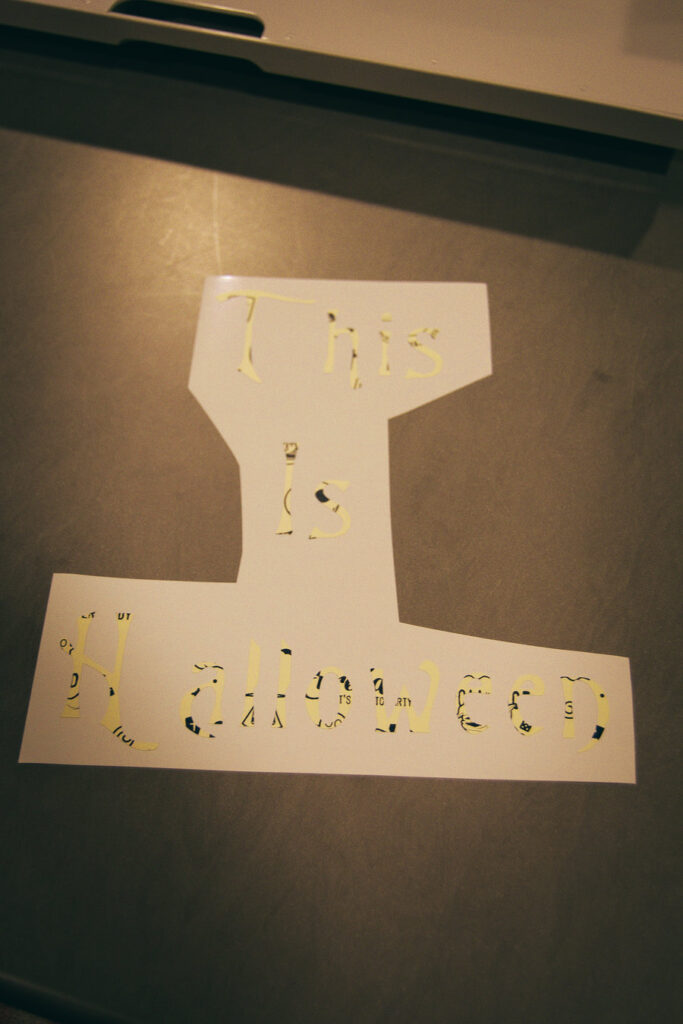
After the cutting is complete, unload your mat from your Cricut Machine. Carefully remove all of the vinyl from your standard grip mat. Next, I cut around the design to remove the extra adhesive vinyl paper. This made the letters easier to work with and I was able to save the extra paper for another time. Next up is weeding the design. There was not too much weeding to do for this project. I just had to peel off the excess paper and weed in the middle of some letters.
Step Five
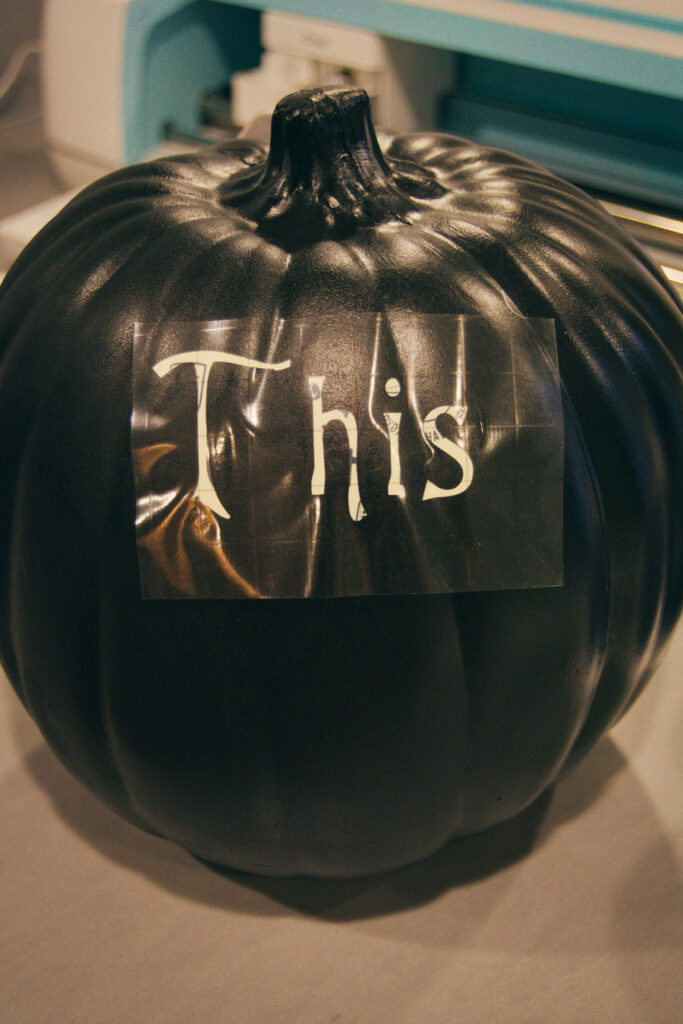
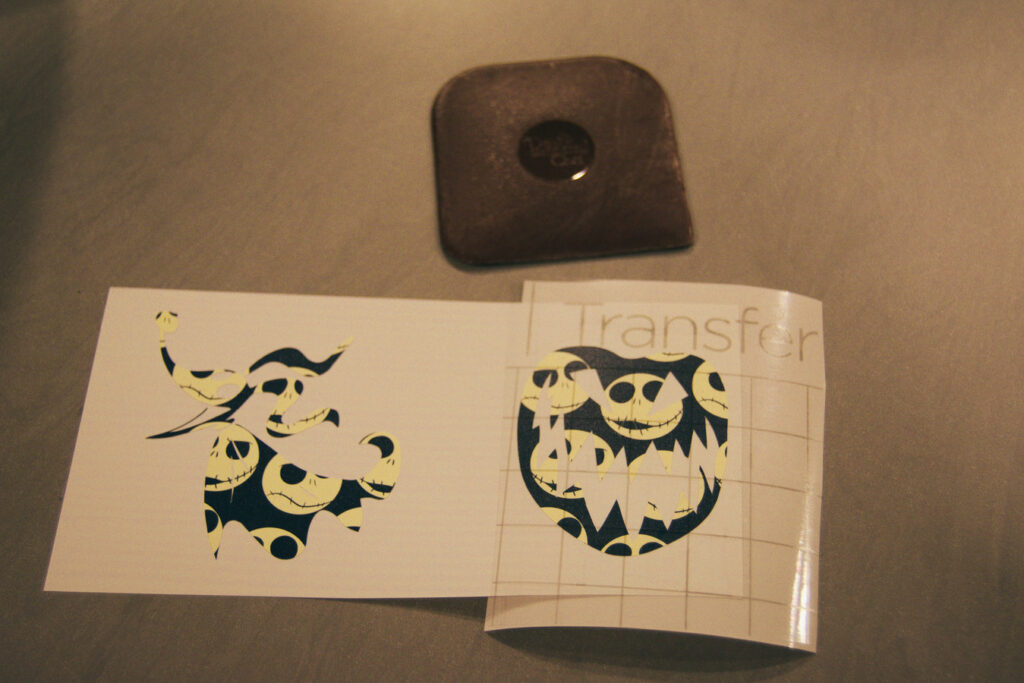
Now it is time to get your transfer tape ready. You can reuse the same piece of transfer tape if it is the correct size for each word. Make sure to cut out a piece or multiple pieces of transfer tape that fits over the entire word.

After cutting the correct size transfer tape, peel off the back side and place the sticky side down onto your vinyl wording. Then you want to use your scraper tool to scrape over the letters so they stick to the tape. I do not have an official scraper tool from Cricut, but rather I use this scraper that is actually meant for cleaning dishes haha. It works well though.
Step Six
To check if the letters stuck to the transfer tape, I would peel the tape back slowly in case some letters did not stick yet. If not all of them stick, just put the tape back down and scrape some more. Once all of the letters are stuck to the tape, place the tape with letters on your pumpkin.
Next, do the same thing you did earlier and scrape the letters onto the pumpkin. Slowly peel off the transfer tape to make sure all the letters stuck to the pumpkin. If any are still stuck on the tape, put the tape back down and scrape again.
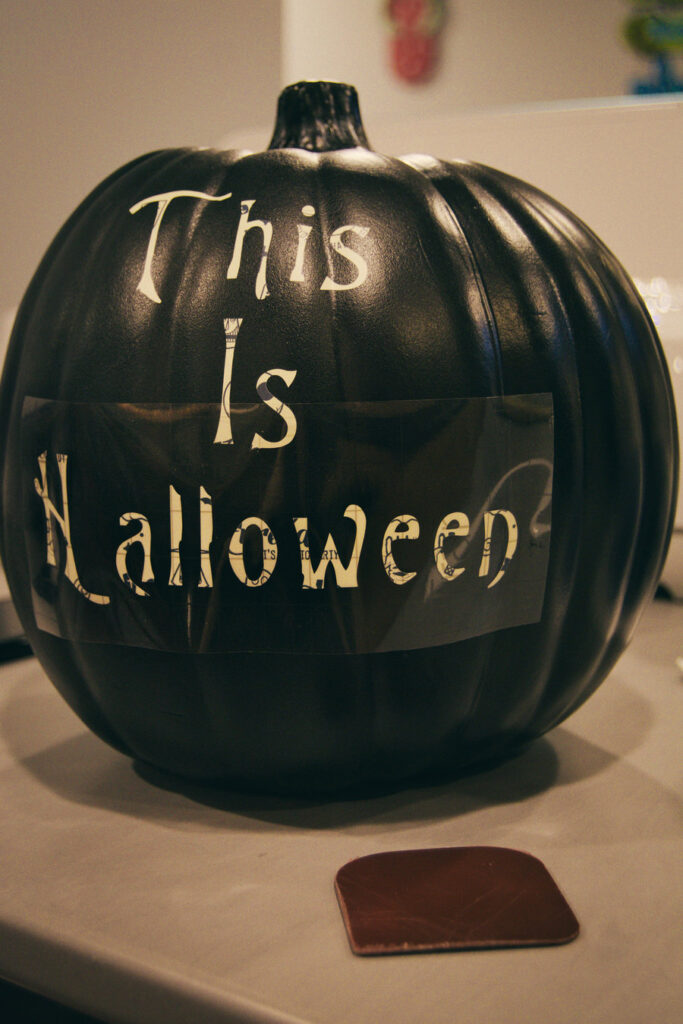
Once all of the letters are stuck to your pumpkin, you can repeat the transferring process with the other two words. After that is complete, you should have “This Is Halloween” on your pumpkin!!
Optional Steps
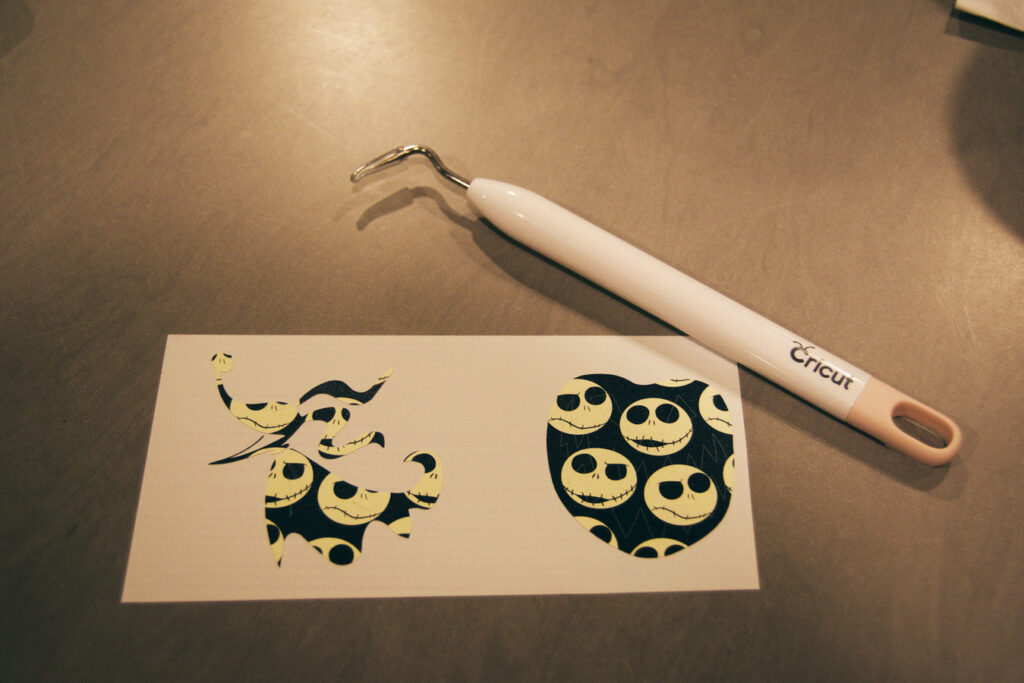
Earlier in this post I wrote about how I added the jack-o-lantern and Zero to my pumpkin. I did this after I put “This Is Halloween” on my pumpkin. I thought the pumpkin could use something else to make it extra spooky. You can definitely do this after adding “This Is Halloween” if you like.
I purchased these Nightmare Before Christmas files off Etsy. After downloading them, I uploaded the SVG ones to Design Space. I adjusted the size of them, attached, and welded them before cutting them out. I also cut them on a different Nightmare Before Christmas adhesive vinyl pattern.

After cutting them with my Cricut machine, I repeated the same weeding and transfer tape steps I walked you through earlier.
This Cricut project was a ton of fun! I had a blast creating this pumpkin. I would definitely recommend trying this project out if you are looking for something fun to do.
As I mentioned earlier, you can definitely customize this project even more by using different color paper, pumpkins, and different images. You should also check out Kayla Makes Cricut pumpkin craft. I am sure there are other ways you can recreate this craft even if you do not have a Cricut machine.
I hope you have enjoyed Blog-O-Ween Day 7 and my This Is Halloween adhesive vinyl pumpkin! If you try this out, make sure to tag me! (@thepoppyskull). If you have other Halloween Cricut projects please let me know!
Check out some of my other Blog-O-Ween posts such as my Nightmare Before Christmas Bathroom and Nightmare Before Christmas Coffee Bar!
Stay Spooky!
-Caroline
Shop the Stay Spooky Collection!


[…] sure to check out some of my other Blog-O-Ween posts including how to make a This Is Halloween Pumpkin and a Nightmare Before Christmas Coffee […]
[…] this month I showed you how I decorated a pumpkin differently this year. In that post, I created my This Is Halloween pumpkin using a fake black pumpkin and my Cricut machine. Today for Blog-O-Ween Day 18, I am going […]